First step in installing your shift kit is to trim the shift rods. The total length of the shift rods installed on the sensor should match the length of the stock shift rod.
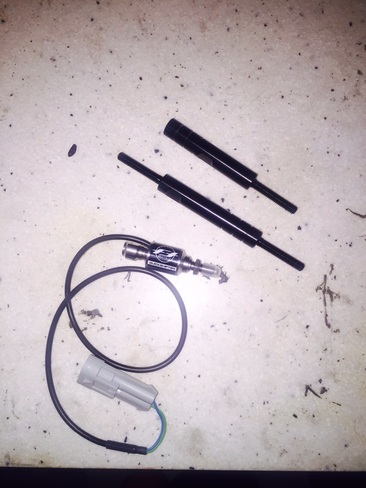

Start by trimming the end that has the flats to accept a wrench. It is very important you trim the correct end. Make the threaded rod around 1/2 inch long.
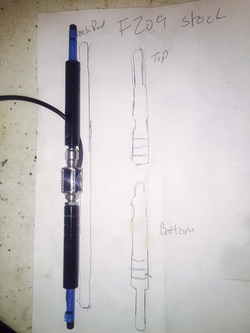
Next step is to screw the male end you just trimmed all the way into the female end of the sensor. Then screw the female end of the remaining shift rod all the way onto the male end of the sensor. I use a template but you should use the stock rod as a guide and trim the remaining two ends.
For trimming I wrap the threads in painters tape, mark the desired spot, and use a cut off wheel on a dremmel to trim them. After trimming I take a small file and dress the threads. Placing a nut on the threads prior to trimming and removing the nut after trimming will work well also.
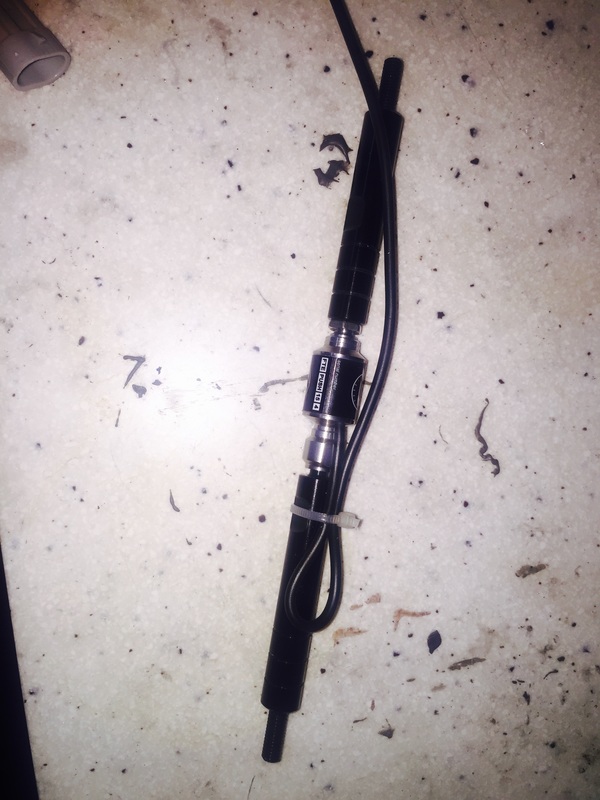
After everything is trimmed, use two 10 mm open end wrenches to tighten all the connections. The wire will actually point down when installed so I place a loop in the wire and zip tie it in place before installing it.
For trimming I wrap the threads in painters tape, mark the desired spot, and use a cut off wheel on a dremmel to trim them. After trimming I take a small file and dress the threads. Placing a nut on the threads prior to trimming and removing the nut after trimming will work well also.
After everything is trimmed, use two 10 mm open end wrenches to tighten all the connections. The wire will actually point down when installed so I place a loop in the wire and zip tie it in place before installing it.
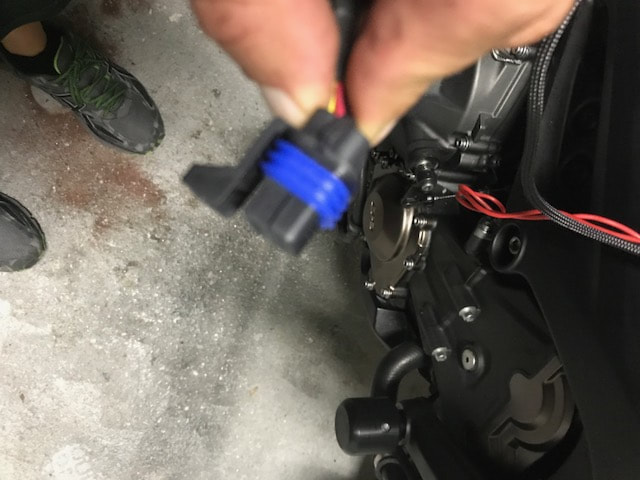
Use these directions if you have the harness to connect to the tip over sensor
You are now going to install the assembles sensor in place of your current shift rod. I usually mark my shifter position prior to removal so it is positioned in the same spot. Follow the directions below to finish the install.
You are now going to install the assembles sensor in place of your current shift rod. I usually mark my shifter position prior to removal so it is positioned in the same spot. Follow the directions below to finish the install.
Use the document on the left if you have the old style tip over switch harness and the document on the right if you have the new programming harness.
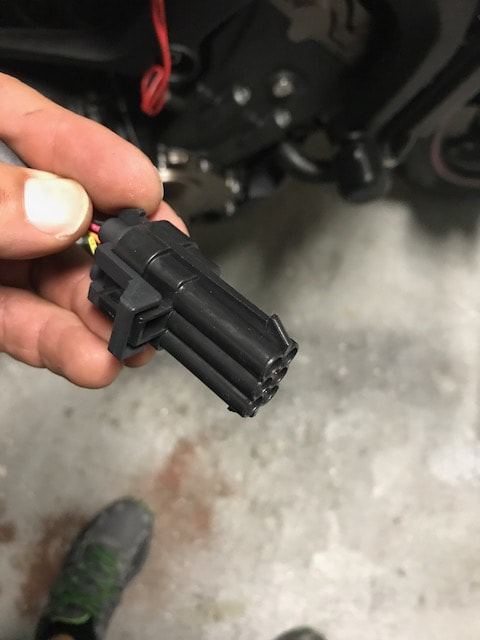
PAY SPECIAL ATTENTION TO THE ORIENTATION OF THE WIRES, IT IS EASY TO LOOK AT THE PIC AND GET THEM BACKWARDS.
DOUBLE CHECK THAT THE THE RED WIRE IS THE CLOSEST TO THE SIDE OF THE PLUG
YOU MUST REMOVE THE CAP FROM THE BIKE HARNESS TO PLUG IT INTO THE QUICK SHIFTER HARNESS SEE PICS BELOW
The new style quick shift sensor is bi directional , to use it for standard shift use the pull side. Connect the side with the red wire. If you have reversed your shift pattern to gp style connect to the black wire side.
|
|
