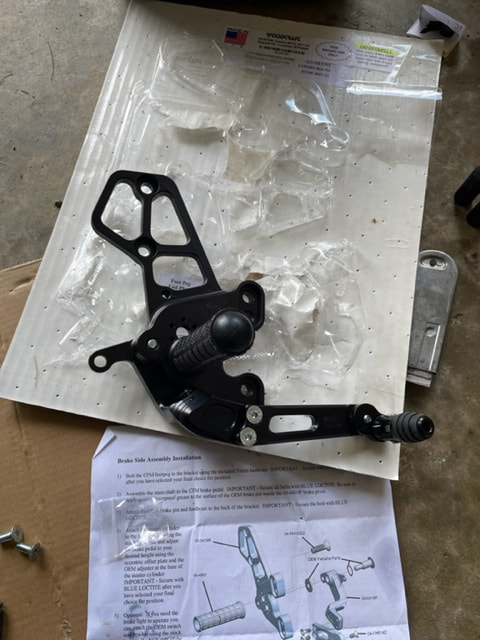
Woodcraft Rearset Install and Review
Start by removing the stock rear sets. Work on one side at a time. Pay attention to where the stock foot peg location and shifter height. This will make it easier to locate the new rear sets where you want them. Setting up rear sets is a little bit trial and error. It is not like installing an exhaust that only has one way to go. Any decent set of rear sets is going to have adjustability. Which is great but adds to the install complexity. Take your time and expect to redo some steps. I put them together first without loctite and then once I'm confident I have them positioned where I want them, I disassemble them and loctite all the bolts. It is important to loctite then or you will have bolts vibrate out. With the Woodcraft there are 2 main install points to the frame and 2 main install points for the pegs. Each footpeg also has eccentric holes drilled into them for more fine adjustment of placement. |
|
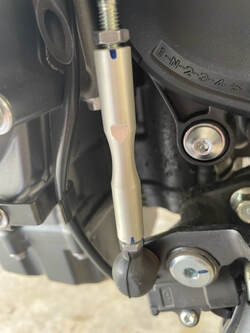
loosen the stop nuts on the shift linkage. The top one is STD thread and the bottom is reverse. You can loosen them slightly and then remove the linkage by turning it out from the top thread.
Leave the shift sensor in place. There is no need to remove it.
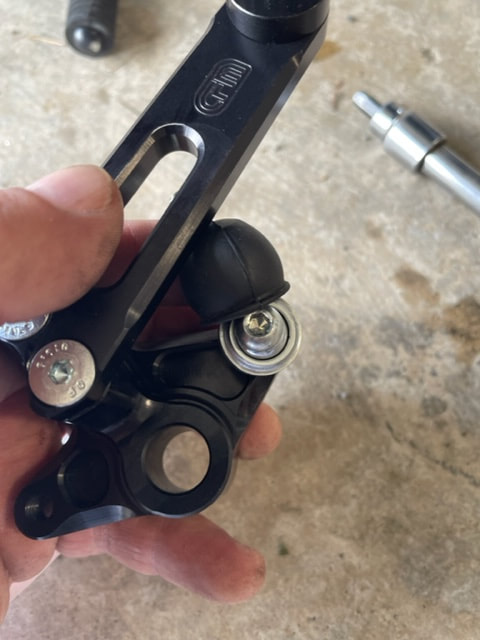
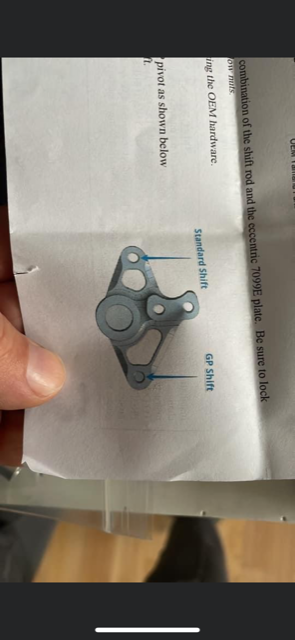
If you are going to run STD shift you hook the stock linkage to the forward side of the pivot and if you are going to use GP shift you hook it to the rearward side of the pivot.
I prefer GP shift, so that is how I hooked mine up. Because of the pivot the quick shifter and auto blipper will still function as normal!
|
|
|
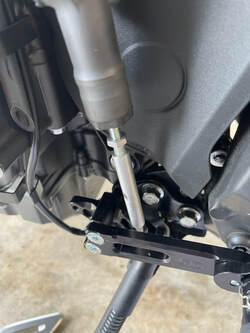
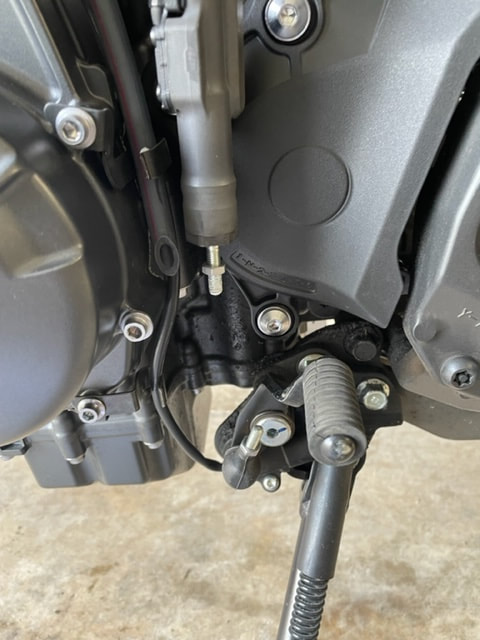
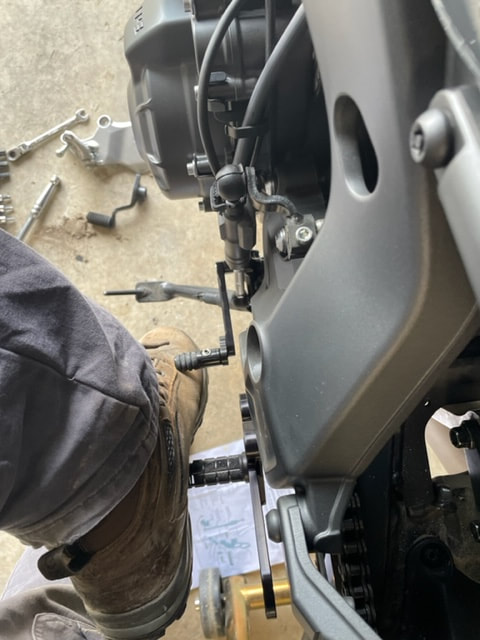
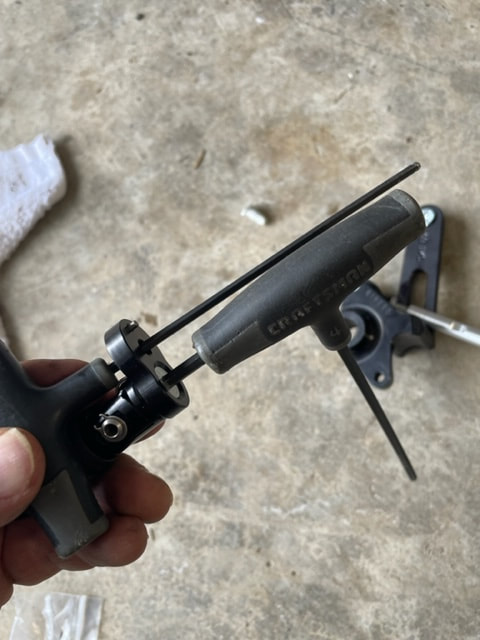
Screw the new shift linkage into the shift sensor end and attach the pivot to the frame as shown in the directions. Adjust the height of the shifter so it is located where you think it should be. The toe pieces have eccentrics in them to adjust the length and height of the shift lever. In the first photo you can see I had the shifter arm too long and it is too close to my foot. I removed it and made adjustments.
I had issues holding everything tight while was tightening it. I used the double T handle technique shown to get them tight.
If you opted for the folding toe pieces, make sure they are set so they will fold back and out of the way in a crash. This will keep them from braking.
I had issues holding everything tight while was tightening it. I used the double T handle technique shown to get them tight.
If you opted for the folding toe pieces, make sure they are set so they will fold back and out of the way in a crash. This will keep them from braking.
|
|
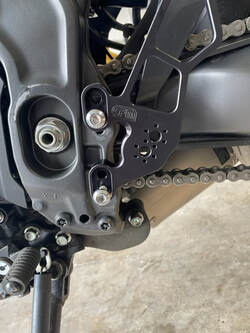
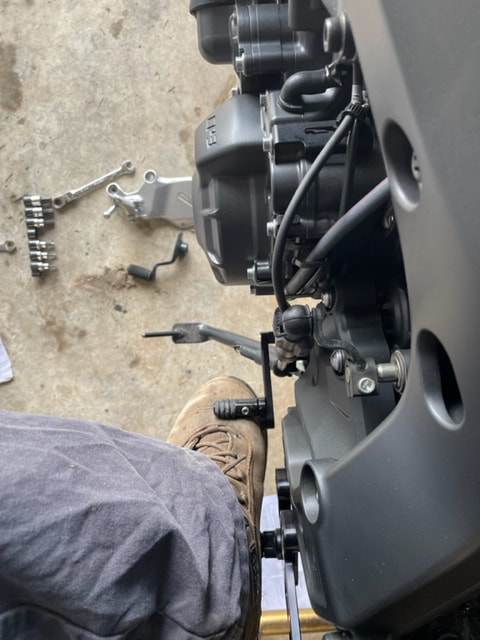
Here is the shifter side finished where I think I want them . All tight and loctite applied.
You can see how much I use my feet when riding by the paint rubbed off the frame by the swingarm pivot.
You can see how much I use my feet when riding by the paint rubbed off the frame by the swingarm pivot.
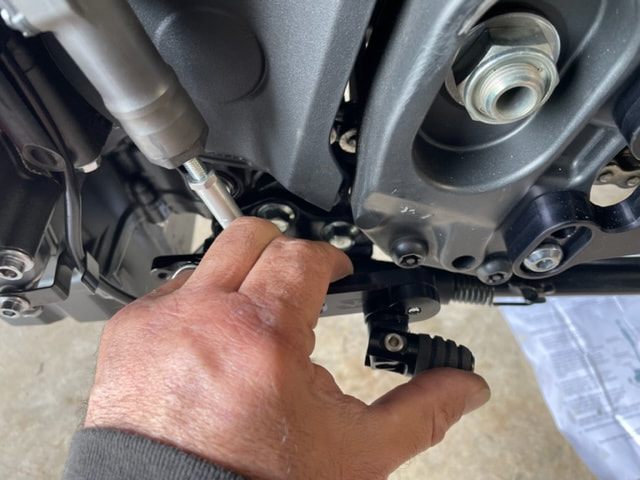
I moved to the brake side. Removing the stock rear sets first. I matched position of the main footpegs on this side to the other side. You do not have to do this, but it seems like it would be the natural way to set them up.
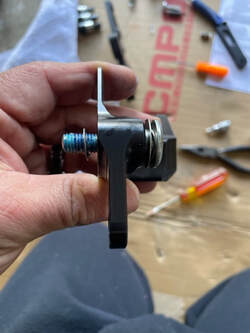
I removed the bolt from the stock brake lever and placed it as shown into the woodcraft brake lever.
You will need to remove the stock master cylinder and attach it to the new rear set.
I used needle nose pliers to straighten and remove the cotter pin. I reused the stock one, but you may want to have an extra handy or just decide to use a new one.
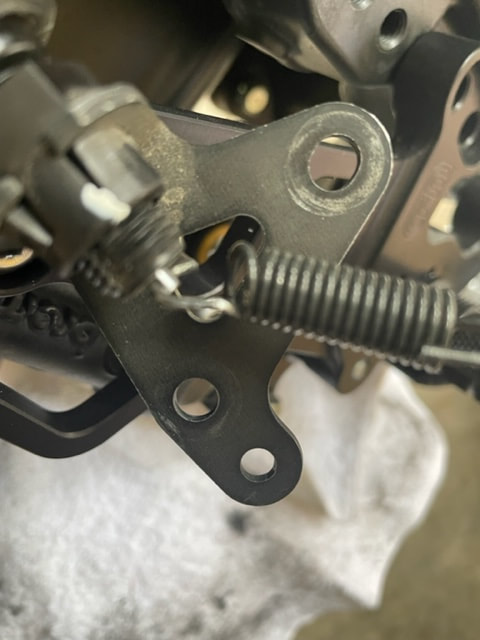
You will also need to remove the bracket that holds the brake light switch and attach it to the back of the new rear set. I recommend leaving the top of the spring in place so that the brake light switch plunger does not fully retract into the switch. If you miss that part, you can pull back the rubber boot, push it out and hook up the top spring
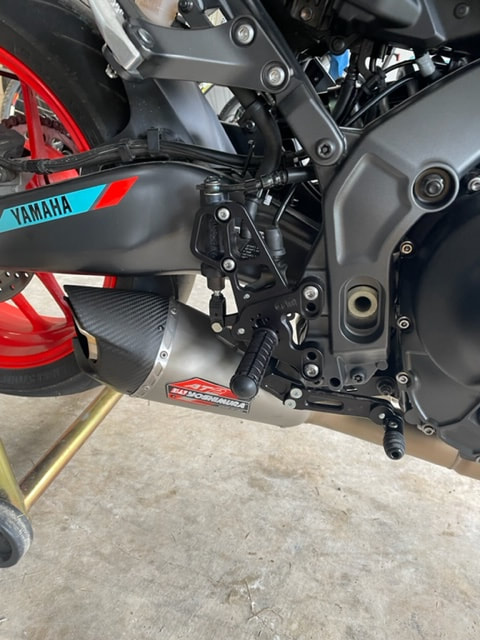
I found this side easier. The below pic is all mounted up with loctite in the position I think I want them.
I may end up making more adjustments after putting some miles on them
I removed the bolt from the stock brake lever and placed it as shown into the woodcraft brake lever.
You will need to remove the stock master cylinder and attach it to the new rear set.
I used needle nose pliers to straighten and remove the cotter pin. I reused the stock one, but you may want to have an extra handy or just decide to use a new one.
You will also need to remove the bracket that holds the brake light switch and attach it to the back of the new rear set. I recommend leaving the top of the spring in place so that the brake light switch plunger does not fully retract into the switch. If you miss that part, you can pull back the rubber boot, push it out and hook up the top spring
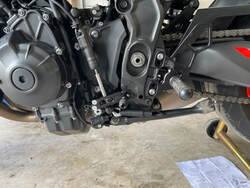
I found this side easier. The below pic is all mounted up with loctite in the position I think I want them.
I may end up making more adjustments after putting some miles on them
|
|
For installing rear sets these where pretty straight forward. Much easier than previous generations that you had to remove the swing arm pivot. As normal with woodcraft products these rear sets are well thought out and sturdy. They seem as if they would hold up well in a crash and there is the added benefit of replacement pieces being easy to get from an American company.
I will post more of a review after I get some miles on them.
I will post more of a review after I get some miles on them.
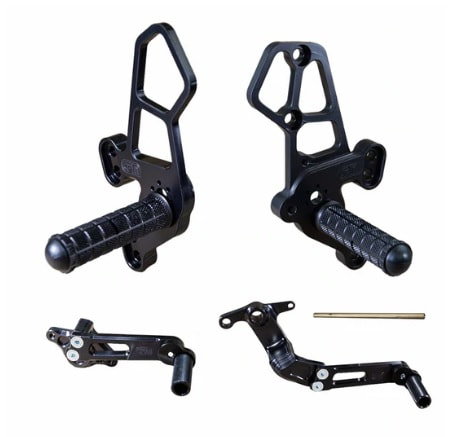
The foot controls are one of the most vital connections you have with your motorcycle. As a result Woodcraft designs and builds the best Rearsets available to ensure your motorcycle reacts the way you intend it to.
- CNC machined from 6061-T6 billet aluminum and offer more than twice the durability of OEM rearset brackets.
- 3-piece Pedals giving you an even stronger assembly and continuing our tradition of easy part replacement.
- Our trick knurled footpegs give supreme feedback and the best traction available today.
- Woodcraft rearset kits offer eccentric foot and toe pegs for adjustability (where applicable).
- Virtually any part in our rearset kit can be purchased separately from our kits under the Spare Parts tab
Kit Specific Details
Shift Pattern: This complete rearset can be used in either STD or GP shift. ( keeping quick shifter and autoblipper functional)
Peg Movement: These adjustable rearsets will allow you at the lowest position to be very close to stock (up and back between 6 - 8 mm). The full range of adjust ability is up 6-30mm and back 6-20mm.
OEM Parts: Woodcraft rearsets assume you are replacing OEM rearsets. This kit utilizes some OEM components - see exploded drawings for details.

Flashed by Vcyclenut Inc. P.O. Box 33 , Lynden, WA, 98264
239-989-7574 When calling if I do not answer please leave a message, I will call back ASAP |